Gauge Wizards
So far you have been reading about all the great tools that allow you to create gauges layer by layer.
With Gauge Wizards you will be able to create entire gauges with multiple layers by just setting some key parameters to define the scales and some design details of the gauge.
Gauge Wizards are currently only available for industries that follow clear patterns on their gauge designs, like industrial pressure and temperature gauges, but more may follow.
These are especially useful when creating double scale gauges as the wizard will handle all the scale value conversions between the two scale units.
Industrial Gauge Wizards
Section titled “Industrial Gauge Wizards”With the Industrial Gauge Wizards tool you will be able to create industry standard Temperature and Pressure gauges in a few minutes by just entering some key values.
Gauge Wizard
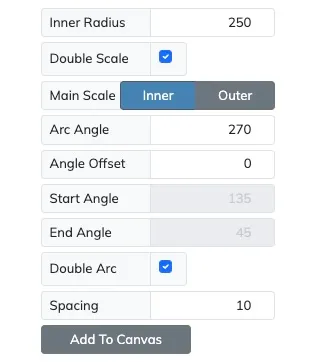
Section titled “Gauge Wizard”The wizard settings are organized into four sections: Gauge Wizard, All Scales, and one or two per-scale sections depending on whether Double Scale is enabled. The following options will be available for both the Temperature and Pressure wizards.
| Setting | Description |
|---|---|
| Inner Radius | Sets the radius of the inner scale. |
| Double Scale | Enables two measurement scales (e.g., °C/°F or Bar/PSI) on the same gauge for dual readings. |
| Main Scale | When Double Scale is enabled, selects which scale (Inner or Outer) is the main scale. The main scale settings section will appear first, and the secondary scale section will follow with additional edge matching settings. |
| Arc Angle | The arc angle of the main scale, from start to end angles, by default symmetrical about the vertical axis. |
| Angle Offset | Offset added to Start Angle to allow for asymmetrical gauge scale arcs. |
| Start Angle | Read-only start angle field, for reference only, as it is automatically calculated from Arc Angle and Angle Offset. |
| End Angle | Read-only end angle field, for reference only, as it is automatically calculated from Arc Angle and Angle Offset. |
| Double Arc | If enabled, on a dual scale, each scale will have their own solid edge arc, otherwise they will share the same. |
| Spacing | Sets the distance between the inner and outer arcs to ensure clear separation and readability, when Double Arc is enabled. |
All Scales
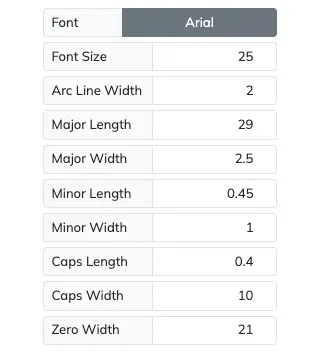
Section titled “All Scales”The settings in this section apply to both scales simultaneously.
| Setting | Description |
|---|---|
| Arc Line Width | Sets the width of the scale arc edge line. |
| Major Length | Sets the length of the major tickmarks. |
| Major Width | Sets the width of the major tickmarks. |
| Minor Length | Sets the length of the minor tickmarks. |
| Minor Width | Sets the width of the minor tickmarks. |
| Caps Length | Sets the relative length of the major tickmark head caps, where 1 is the whole length of the major tickmarks. Disabled when no scale has Tick Caps enabled. |
| Caps Width | Sets the width of the major tickmark head caps. Disabled when no scale has Tick Caps enabled. |
| Zero Width | Sets the width of the zero band marker over the zero major tickmark. Disabled when no scale has Zero Band enabled. |
| Font | Allows you to select the font that will be used for all the text elements of the gauge. |
| Font Size | Sets the font size for all the text elements of the gauge. |
Scale Options
Section titled “Scale Options”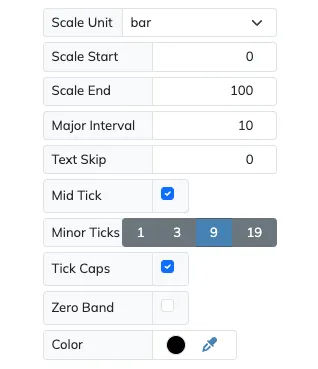
When Double Scale is enabled, two scale sections will be shown: the Main Scale section first, followed by the Secondary Scale section. The secondary scale may have some parameters disabled as those will be set by the conversion from the main scale values.
| Setting | Description |
|---|---|
| Scale Unit | Selects the measurement unit for this scale. |
| Scale Start | Specifies the first scale value. |
| Scale End | Specifies the last scale value. |
| Major Interval | Specifies the major interval value at which major tickmarks and scale values should be set. |
| Text Skip | By default, the numeric scale values match the positions of the major tickmarks, but this option allows us to skip some major tickmarks if these are not meant to match. |
| Mid Tick | Enables the mid tickmark between major tickmarks. The mid tick will be longer than the other minor tickmarks to standout. |
| Minor Ticks | Sets the number of minor ticks between major tickmarks. When Mid Tick is off the available values are: 0, 4, 9. When Mid Tick is on the available values are: 1, 3, 9, 19. |
| Tick Caps | If enabled, the major tickmarks will have wide head caps to make them standout. |
| Zero Band | Enables the zero band marker over the zero major tickmark. |
| Color | Sets the color to be used by all the layers that make up this scale. |
Secondary Scale Edge Matching
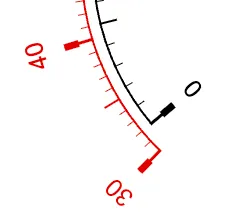
Section titled “Secondary Scale Edge Matching”The Secondary Scale section includes additional Start and End settings that define how to calculate the edge values of the secondary scale relative to the main scale. These settings will automatically calculate the secondary scale edge values by matching the main scale based on one of the following rules:
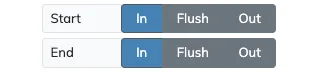
In- The secondary scale will be set to the value of the main scale’s edge value, converted to the secondary scale’s unit that is the closest multiple of the Major Interval, and lies within the arc angle range of the main scale arc.
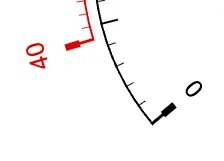
Flush- The secondary scale will be set to the value of the main scale’s edge value converted to the secondary scale’s unit that is the closest full value.
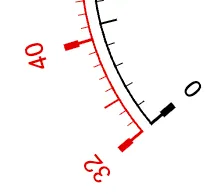
Out- The secondary scale will be set to the value of the main scale’s edge value, converted to the secondary scale’s unit that is the closest multiple of the Major Interval, and lies outside the arc angle range of the main scale arc.
Temperature Wizard
Section titled “Temperature Wizard”![]()
On the Temperature Wizard you must select the temperature unit of the scales. When using two scales, the outer scale will default to the temperature unit not used on the inner scale.
Pressure Wizard
Section titled “Pressure Wizard”
On the Pressure Wizard you must select the pressure unit of the scales. When using two scales, the outer scale will default to a pressure unit that is commonly used as counterpart to the unit used on the inner scale.
![]()
Once you are happy with your wizard gauge design, use the Add To Canvas button to add all the resulting layers to your canvas. There you will be able to fine-tune all the individual layers that make up the gauge.